Last Updated on October 18, 2026
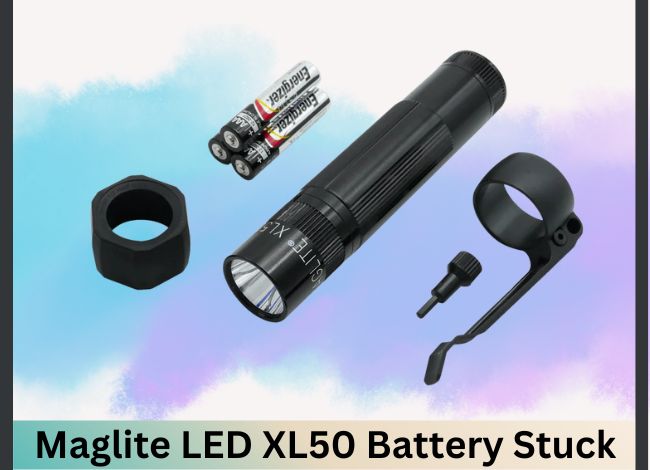
If you’re dealing with a Maglite LED XL50 battery stuck inside your flashlight, you’re not alone. Battery corrosion, leakage, and swelling can make batteries difficult to remove, sometimes leaving an otherwise reliable flashlight completely unusable.
The good news is that mild battery problems can sometimes be resolved with careful cleaning and gentle removal. However, forcing a swollen or badly corroded battery out can damage the flashlight and expose you to harmful battery chemicals.
In this guide, we’ll explain why batteries get stuck in the Maglite XL50, how to remove them safely, and what to do if corrosion has damaged the battery compartment. We’ll also cover prevention tips, replacement options, and warranty information.
Why Does the Maglite LED XL50 Battery Get Stuck?
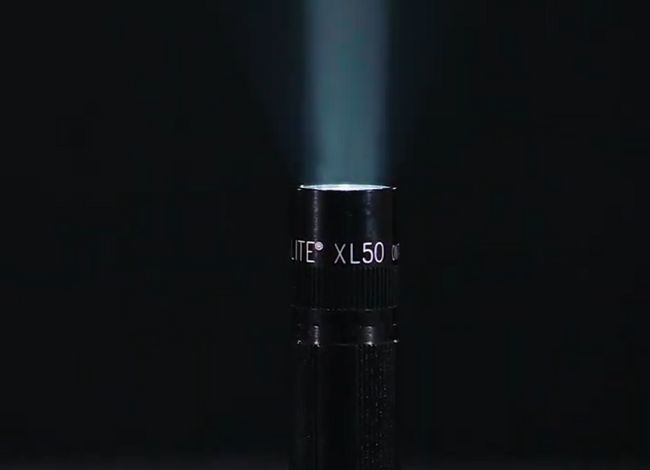
The Maglite LED XL50 is a compact aluminum flashlight powered by three AAA alkaline batteries. It’s known for its durable construction, convenient tail-cap switch, and portable design.
However, like other battery-powered flashlights, it can develop corrosion problems when batteries are left inside for extended periods.
Common Reasons Batteries Become Stuck
- Battery corrosion: Leaking alkaline batteries leave deposits that can bind the batteries to nearby contacts or the battery holder.
- Battery swelling: Aging, damage, or excessive heat can cause batteries to expand, making removal difficult.
- Long-term storage: Leaving batteries inside an unused flashlight increases the risk of leakage.
- Moisture exposure: Humidity and water intrusion can accelerate corrosion on electrical contacts.
- Damaged battery holder: Warped plastic or damaged contacts may prevent batteries from sliding out normally.
Alkaline batteries typically contain potassium hydroxide electrolyte. When leakage occurs, it can leave white crystalline deposits and cause corrosion on metal components.
Maglite also identifies battery leakage and swelling as common reasons batteries become stuck inside flashlights.
Our flashlight battery types guide explains how different battery chemistries affect performance, leakage risk, and storage.
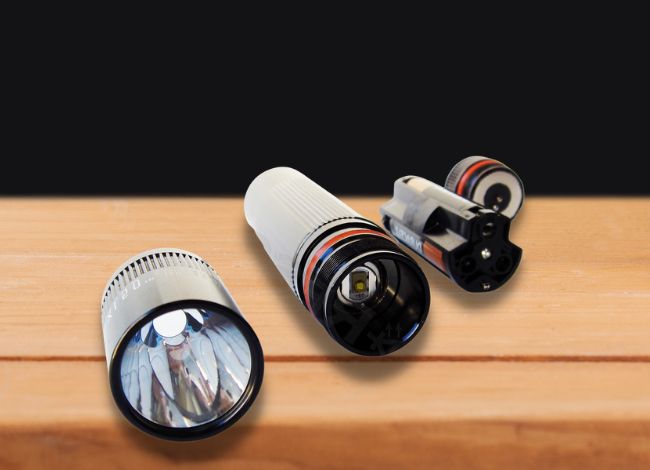
Understanding the Maglite XL50 Battery Compartment
Before attempting to remove stuck batteries, it’s helpful to understand how the XL50 holds its power source.
The Maglite XL50 uses three AAA alkaline batteries arranged inside its battery compartment. The batteries must be installed according to the polarity markings in the holder.
Unlike larger Maglite flashlights that hold C- or D-cell batteries directly inside a long barrel, the compact XL50 uses a different battery arrangement.
This matters because you should not force tools deep into the flashlight or assume that the battery-removal procedure for a large Maglite will work on the XL50.
If the battery holder can be removed normally, inspect it separately. If it won’t move because of corrosion or swelling, don’t force it.
Tools and Materials You’ll Need
Before working on a stuck Maglite LED XL50 battery, gather a few basic supplies.
- Protective gloves: Nitrile or chemical-resistant gloves to avoid direct contact with leaked electrolyte.
- Safety glasses: Protect your eyes from loose corrosion particles.
- Rubber grip pad: Helps loosen a tight tail cap without scratching the flashlight.
- Soft cloth or paper towels: For cleaning and protecting your work surface.
- Cotton swabs: Useful for cleaning accessible battery contacts.
- Soft toothbrush: Helps remove loose corrosion deposits.
- White vinegar: Can help clean minor alkaline-battery residue.
- Isopropyl alcohol: For final cleaning of accessible metal contacts.
- Small flashlight: Helps you inspect the battery compartment.
Important: Avoid using corkscrews, wood screws, drills, sharp screwdrivers, or other pointed tools to penetrate stuck batteries.
Likewise, do not use a hair dryer, heat gun, or open flame to heat the flashlight while batteries are inside.
These methods can damage the batteries, cause electrolyte leakage, and make the situation more dangerous.
How to Remove a Stuck Battery From a Maglite LED XL50
If your Maglite LED XL50 battery is stuck, start with the least aggressive method. The goal is to remove the batteries without damaging the flashlight or exposing yourself to leaked electrolyte.
Step 1: Put Safety First
Before attempting removal:
- Switch off the flashlight.
- Wear protective gloves and safety glasses.
- Work in a well-ventilated area.
- Cover your work surface with paper towels.
- Keep children and pets away from the area.
If you notice liquid leakage, heavy corrosion, unusual heat, or severe swelling, stop using the flashlight.
Do not touch leaked battery chemicals with bare hands. If electrolyte contacts your skin or eyes, rinse immediately with plenty of running water and seek medical assistance when appropriate, especially for eye exposure.
Step 2: Open the Tail Cap Carefully
The battery compartment is accessed through the flashlight’s tail cap.
- Hold the flashlight body firmly.
- Turn the tail cap counterclockwise.
- If it’s tight, use a rubber grip pad to improve your grip.
- Apply steady pressure rather than sudden force.
- Stop if the cap appears completely seized.
Battery leakage can sometimes cause corrosion around the cap threads, making it difficult to open.
If the tail cap is stuck, our guide on removing a stuck Maglite battery cap explains additional precautions and safer ways to improve your grip.
Do not crush the flashlight body with locking pliers or a bench vise.
Step 3: Inspect the Battery Compartment
Once the tail cap is removed, inspect the batteries and battery holder.
Look for:
- White or greenish corrosion deposits.
- Swollen or distorted battery casings.
- Rust or discoloration on metal contacts.
- Broken or bent contact springs.
- Warped or damaged plastic around the batteries.
If you see heavy corrosion or swollen batteries, don’t continue with forceful removal.
Take a photo of the damage before cleaning, especially if you may need to submit a battery-leakage claim.
Step 4: Attempt Gentle Battery Removal
If the batteries appear intact and there is no significant corrosion, try removing them normally.
- Hold the flashlight over a soft, protected surface.
- Position the open battery compartment downward.
- Gently tilt the flashlight to see whether the battery holder can slide out.
- If it comes out easily, remove the batteries according to the holder’s design.
- Inspect the battery contacts before installing replacements.
A gentle tap against your gloved palm may help a loose holder move, but avoid striking the flashlight against hard surfaces.
If the holder or batteries remain firmly stuck, stop rather than pulling harder.
Safety tip: Never insert a metal screwdriver between a damaged battery and its holder. This can puncture the battery casing, damage the contacts, or create an electrical short.
Step 5: Avoid Corkscrews and Wood Screws
Some older flashlight-repair demonstrations recommend driving a corkscrew or wood screw into a stuck battery and pulling it out with pliers.
Although this method may appear effective in certain demonstrations, it’s not a safe approach for ordinary flashlight maintenance.
Puncturing an alkaline battery can expose its electrolyte and damage the surrounding components.
If the batteries are stuck badly enough that a screw seems necessary, the safer choice is to seek professional help or replace the affected battery holder if it can be removed intact.
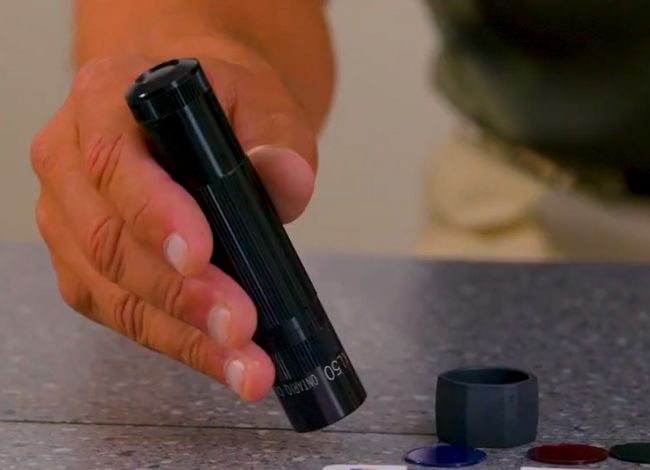
Step 6: Clean Accessible Battery Corrosion
If you’ve safely removed the batteries and the holder has minor corrosion, careful cleaning may restore electrical contact.
White vinegar can help neutralize certain residues left by leaking alkaline batteries.
Cleaning instructions:
- Make sure all batteries have been removed.
- Use a dry cotton swab or soft brush to remove loose corrosion.
- Lightly dampen a fresh cotton swab with white vinegar.
- Apply it only to accessible areas affected by alkaline-battery residue.
- Gently remove the loosened deposits using a soft brush or clean swab.
- Wipe the area carefully with a clean, slightly damp cloth.
- Use a separate swab lightly dampened with isopropyl alcohol on accessible metal contacts if needed.
- Allow the components to dry completely before installing batteries.
Important: Don’t pour vinegar, water, or alcohol into the flashlight body. Avoid soaking the battery holder or sealed electronic components.
Also, baking soda is not the appropriate first choice for neutralizing ordinary alkaline battery leakage because it is itself alkaline.
If corrosion has severely damaged the battery contacts, cleaning may not restore dependable operation.
Step 7: Don’t Use Heat to Force the Battery Out
Heating a flashlight body may seem like a way to expand the metal and loosen a stuck battery, but this can create unnecessary risks.
Using a hair dryer, heat gun, boiling water, or another heat source may:
- Increase pressure inside a damaged battery.
- Cause additional electrolyte leakage.
- Damage the flashlight’s plastic battery holder.
- Affect seals or electronic components.
- Make battery removal more dangerous.
For these reasons, don’t attempt to heat the Maglite XL50 with batteries still inside.
If the battery holder is seized by corrosion, contact a qualified repair technician or Maglite support.
Video: Removing Stuck Batteries From a Maglite
The following video demonstrates stuck-battery removal from a Maglite flashlight.
Keep in mind that different Maglite models use different battery arrangements. Some procedures shown for larger flashlights may not be suitable for the compact XL50, especially when they involve force, heat, or penetrating batteries.
What If the Maglite XL50 Still Won’t Work?
Sometimes, removing the stuck batteries doesn’t completely solve the problem.
Battery leakage can damage the contacts, tail-cap switch, or other internal electrical components.
Before deciding that your flashlight is beyond repair, check the following:
- Battery contacts: Look for corrosion, broken springs, or badly pitted metal.
- Battery holder: Make sure it isn’t cracked or distorted.
- Battery polarity: Install replacement batteries according to the compartment markings.
- Tail-cap connection: Check that the cap closes securely and operates normally.
- Battery quality: Use three fresh, matching AAA alkaline batteries.
If the flashlight remains unresponsive, the electrical circuit or switch may need professional inspection.
For more information about how these components work, read our guide to the main parts of a flashlight.
Can You Replace the Maglite XL50 Battery Holder?
If the batteries have damaged the holder but the flashlight body and electronics remain intact, replacing the affected component may be worth considering.
However, replacement parts must match the XL50’s specific design.
Not every Maglite battery carrier or tail-cap assembly is interchangeable between different models.
Contact Maglite’s official website to ask about compatible parts and service availability.
If corrosion has spread into the flashlight’s electronic assembly, replacing the entire unit may be more practical than repairing it.
How to Prevent Maglite XL50 Batteries From Getting Stuck
Preventing battery leakage is easier than dealing with a seized battery compartment.
Follow these maintenance habits to keep your flashlight working reliably.
1. Inspect Batteries Regularly
Check the batteries every few months, especially if the flashlight is stored for emergency use.
Look for discoloration, deposits, swelling, or other signs of damage.
2. Remove Batteries During Long-Term Storage
If you won’t be using the flashlight for several months, remove the batteries and store them separately.
This reduces the risk of damage if a battery leaks while the flashlight is unused.
3. Use the Correct Battery Type
Maglite specifies three AAA alkaline batteries for the XL50.
Don’t assume rechargeable lithium-ion or other higher-voltage batteries are compatible simply because they fit.
Always check the manufacturer’s battery requirements.
4. Avoid Mixing Batteries
Don’t mix old and new batteries, different brands, or different battery chemistries.
Replace all three AAA batteries together to help maintain consistent performance.
5. Store the Flashlight in a Cool, Dry Place
Excessive heat and moisture can accelerate battery deterioration.
A dry storage drawer or protected equipment case is generally better than a damp basement or hot vehicle.
6. Keep the Battery Contacts Clean
Periodically inspect accessible metal contacts and remove dirt with a soft, dry cloth.
Make sure the battery compartment is completely dry before installing fresh batteries.
Maglite LED XL50 Stuck Battery Troubleshooting Checklist
Use this table to identify the likely cause of a Maglite LED XL50 battery stuck problem and decide what to do next.
| Problem | Possible Cause | Recommended Action |
|---|---|---|
| Tail cap won’t unscrew | Corrosion or overtightening | Try a rubber grip without excessive force |
| Battery holder won’t slide out | Corrosion, swelling, or damaged holder | Avoid force and seek assistance if firmly stuck |
| White deposits inside | Alkaline battery leakage | Clean accessible residue carefully after removing batteries |
| Battery swollen or distorted | Battery deterioration or damage | Do not puncture, pry, or heat the battery |
| Flashlight won’t turn on | Damaged contacts, switch, or circuit | Inspect accessible contacts and test with fresh batteries |
| Heavy corrosion or permanent damage | Severe battery leakage | Contact Maglite or the battery manufacturer |
Does the Maglite Warranty Cover Battery Leakage?
The Maglite XL50 is covered by a 10-year limited warranty against qualifying manufacturing defects, subject to the terms applicable to the product.
However, battery leakage and damage resulting from battery leakage are excluded from Maglite’s warranty coverage.
According to Maglite’s official guidance, owners whose flashlights have been damaged by leaking batteries should contact the battery manufacturer about its device-damage claim process.
Some battery manufacturers offer compensation or replacement programs when qualifying battery leakage damages a device.
Before submitting a claim:
- Identify the brand of batteries that leaked.
- Take clear photographs of the damage.
- Keep the purchase information, if available.
- Contact the battery manufacturer’s customer service department.
- Follow its instructions before sending the flashlight or batteries anywhere.
You can review the official Maglite battery-leakage and warranty FAQs for more information.
When to Seek Professional Help
Not every stuck-battery problem can be solved safely at home.
Professional assistance is recommended when:
- The batteries are swollen or visibly damaged.
- The battery holder is firmly seized inside the flashlight.
- Heavy corrosion extends into the electrical components.
- The tail cap cannot be removed with reasonable hand pressure.
- The flashlight still doesn’t work after safe cleaning and battery replacement.
If the flashlight has severe corrosion, the cost of replacing damaged components may exceed the value of the flashlight.
In that case, replacement may be the more practical option.
Frequently Asked Questions About Maglite XL50 Stuck Batteries
1. Why is my Maglite LED XL50 battery stuck?
The most common causes are alkaline battery leakage, corrosion, swelling, and long-term storage. Leaking electrolyte can create deposits around the batteries and contacts, preventing normal removal.
2. How many batteries does the Maglite XL50 use?
The Maglite XL50 uses three AAA alkaline batteries. Always install them according to the polarity markings and replace all three at the same time.
3. Can I use vinegar to clean Maglite battery corrosion?
A small amount of white vinegar can help remove certain deposits caused by leaking alkaline batteries. Apply it carefully with a cotton swab to accessible affected areas after removing the batteries. Avoid soaking the flashlight or allowing liquid to reach sealed electronics.
4. Can I drill or screw into a stuck battery to remove it?
No. Drilling or puncturing batteries can expose hazardous electrolyte and damage the flashlight. If a battery is too swollen or corroded to remove normally, seek professional assistance.
5. Is the Maglite XL50 rechargeable?
No. The standard Maglite XL50 uses three disposable AAA alkaline batteries and doesn’t have a built-in charging system. Do not attempt to recharge alkaline batteries.
6. Will Maglite replace my flashlight if the batteries leak?
Maglite generally excludes battery-leakage damage from its flashlight warranty. However, the battery manufacturer may offer a separate device-damage claim program. Contact the battery manufacturer to check eligibility.
Final Thoughts
Finding a Maglite LED XL50 battery stuck inside your flashlight can be frustrating, but it doesn’t always mean the flashlight is beyond repair.
If the batteries are intact and only slightly difficult to remove, careful inspection and gentle handling may solve the problem. Minor corrosion on accessible contacts can sometimes be cleaned after the batteries have been removed safely.
However, if the batteries are swollen, badly corroded, or firmly lodged inside the holder, avoid using screws, excessive force, or heat. Those methods can cause more damage and create unnecessary safety risks.
The best prevention is simple: use fresh, compatible batteries, inspect them regularly, and remove them during long-term storage.
For additional flashlight maintenance tips and product comparisons, explore Tactical Flashlight Guide.