Last Updated on October 8, 2026
How to Fix a Push-Button Flashlight: Step-by-Step Repair Guide
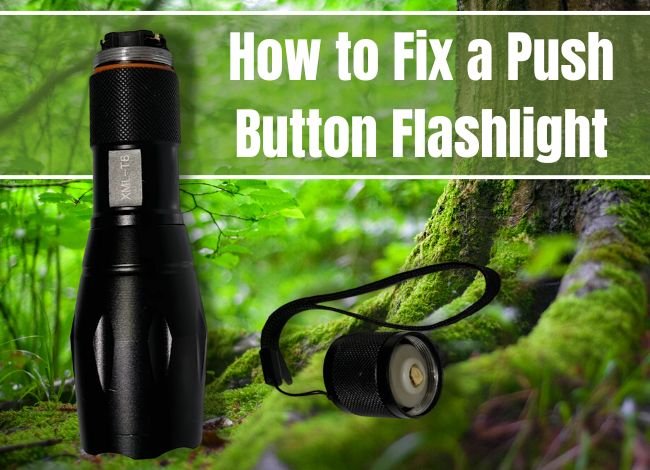
A flashlight is an essential tool for your home, vehicle, or outdoor adventures. Whether you’re camping, working in a dark garage, or dealing with a power outage, having a reliable flashlight makes everyday tasks easier.
But what happens when you press the power button and nothing happens? Sometimes the light flickers, the button gets stuck, or the flashlight only works after several attempts.
Learning how to fix a push-button flashlight can save you the cost of replacing a perfectly good light. Many problems come from weak batteries, dirty contacts, or loose connections rather than a completely broken switch.
In this guide, we’ll explain how push-button flashlights work, what causes common failures, and how to troubleshoot them safely before replacing any parts.
What Is a Push-Button Flashlight?
A push-button flashlight is a portable light operated by a button, usually located on the tail cap or side of the body.
Depending on the design, pressing the button can turn the flashlight on or off, change brightness, or activate different lighting modes.
Common features include:
- Convenient one-handed operation
- Tail-cap or side-mounted power switch
- Replaceable or rechargeable batteries
- Multiple brightness settings on some models
- Compact and durable construction
Push-button switches are convenient, but they can wear out or stop responding because of dirt, moisture, or electrical problems.
How Does a Push-Button Flashlight Work?
A typical push-button flashlight contains a battery, LED or bulb, electrical contacts, and a power switch.
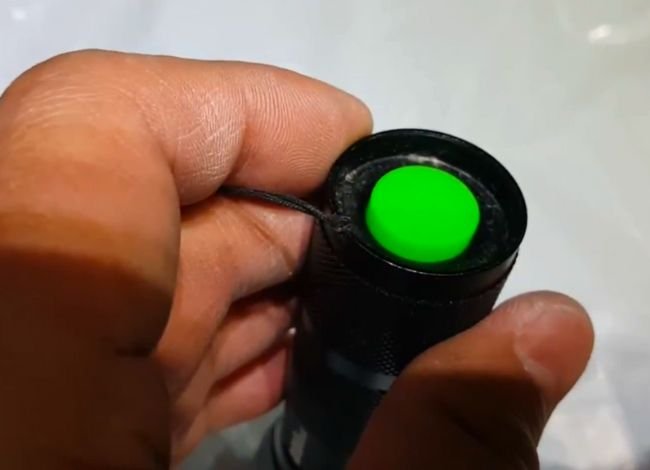
In a simple mechanical flashlight, pressing the switch closes an electrical circuit and allows current to reach the LED or bulb.
Some modern flashlights work differently. Their buttons send signals to an electronic driver, which controls brightness and operating modes.
That’s why a faulty button doesn’t always mean the entire switch assembly needs replacing. The problem could be the battery, electrical contacts, or electronic control circuit.
If you’re unfamiliar with the internal components, our guide to the main parts of a flashlight explains how the switch, battery contacts, LED, and driver work together.
Why Is My Push-Button Flashlight Not Working?
Before opening your flashlight, check the most common reasons it might have stopped working.
1. Dead or Damaged Battery
A weak battery is one of the most common causes of flashlight problems.
Common signs include:
- Dim or weak light output
- Flickering during use
- Flashlight shutting off unexpectedly
- No response when pressing the button
Solution: Install fresh batteries or fully charge the approved rechargeable battery. Check the battery orientation and look for leakage or physical damage.
Never charge a disposable battery or use an incompatible lithium-ion cell simply because it fits inside the flashlight.
2. Faulty Push-Button Switch
Frequent use, dirt, or physical damage can cause the button to become unresponsive.
You may notice that the switch feels loose, sticks when pressed, or works only intermittently.
Solution: Clean around the outside of the button with a soft brush. If the flashlight has a removable, user-serviceable switch assembly, follow the manufacturer’s instructions for inspection or replacement.
Don’t pry apart a sealed switch housing without model-specific instructions.
3. Dirty or Corroded Contacts
Battery contacts can accumulate dirt, oxidation, or corrosion over time. Even a small amount of residue may interrupt the electrical connection.
Solution: Remove the batteries and inspect accessible metal contacts. Use a soft, dry cloth or brush to remove loose dirt.
For suitable exposed contacts, a cotton swab lightly moistened with isopropyl alcohol may help remove residue. Allow everything to dry completely before reinstalling the batteries.
If batteries have leaked, wear protective gloves and avoid spreading the chemical residue into the flashlight’s electronics.
4. Damaged Internal Connections
Some flashlights contain internal wires, while others use springs, metal contacts, and circuit boards to carry electricity.
A hard impact or damaged connection can cause intermittent operation.
Solution: Check accessible contacts and removable components first. If you suspect broken internal wiring or circuit-board damage, professional repair may be necessary.
How to Fix a Push-Button Flashlight: Step-by-Step Instructions
If your flashlight has stopped working, follow these checks in order. Start with the easiest fixes before considering switch replacement or internal repairs.
Tools You May Need
- Soft microfiber cloth
- Cotton swabs
- Isopropyl alcohol for suitable contacts
- Small soft-bristled brush
- Fresh compatible batteries
- Multimeter (optional)
- Small screwdriver, if the model permits disassembly
- Manufacturer-approved replacement switch, if needed
Step 1: Turn Off the Flashlight
Disconnect the flashlight from its charger and switch it off.
If the battery compartment is user-accessible, remove the batteries before cleaning or inspecting components.
Never work on the switch while the flashlight is connected to charging power.
Step 2: Check the Battery
Look for weak, leaking, swollen, or incorrectly installed batteries.
Replace disposable batteries with a fresh matching set. For rechargeable flashlights, use an approved battery that has been charged according to the manufacturer’s instructions.
If a battery is swollen, leaking, or overheating, stop using it. Don’t puncture or force it out of the flashlight.
Different battery chemistries have different voltages and charging requirements. Our flashlight battery types guide explains how to identify a suitable replacement and avoid compatibility problems.
Step 3: Inspect the Push Button
Press the button normally and pay attention to how it feels.
A mechanical click switch should generally provide a consistent response. However, electronic buttons may have a softer feel, so compare the behavior with your model’s normal operation.
Check for visible dirt, cracks, or damage around the button.
Use a soft brush to clean the exterior. Avoid spraying liquids directly into the switch.
Step 4: Check the Tail Cap and Connections
On flashlights with a removable tail cap, make sure it is properly installed and its accessible contacts are clean.
A loose tail cap can interrupt the circuit and make the flashlight appear defective.
If your model has removable components, check that they are seated correctly. Don’t force apart factory-sealed sections.
Step 5: Clean the Electrical Contacts
Inspect accessible springs, battery terminals, and metal contact surfaces.
Remove loose dirt using a soft brush or cloth. If necessary and appropriate for the surface, use a small amount of isopropyl alcohol on a cotton swab.
Allow the contacts to dry completely before installing the batteries.
Avoid aggressive sanding or scraping, which may damage protective plating on electrical contacts.
Step 6: Test the Switch With a Multimeter (Optional)
If you have a basic mechanical switch and know how to use a multimeter, a continuity test may help identify whether the switch is working.
- Remove the battery and disconnect charging power.
- Access the switch terminals only if your flashlight’s service instructions permit it.
- Set the multimeter to continuity mode.
- Place the probes on the switch terminals.
- Press and release the button while observing the reading.
A simple normally-open switch should change from an open circuit to continuity when pressed.
However, this test doesn’t apply to every electronic flashlight switch. Don’t probe powered circuit boards or short battery contacts.
Step 7: Replace the Switch if Necessary
If the switch is confirmed defective, check whether the manufacturer offers a replacement switch or tail-cap assembly.
Some flashlights have user-replaceable switches. Others require professional service because the switch is sealed or connected directly to the electronics.
Use only a replacement approved for your exact flashlight model.
For example, our guide on troubleshooting a Streamlight flashlight covers switch problems alongside battery, charging, and contact failures. Always follow the repair instructions for your particular model.
Step 8: Reassemble and Test the Flashlight
Once the accessible components are clean and properly installed:
- Insert the correct batteries with the proper polarity.
- Reattach the battery compartment or tail cap.
- Make sure any removable seals are correctly seated.
- Turn on the flashlight.
- Test the available brightness settings and operating modes.
If the flashlight works normally, the problem was likely related to the battery, switch, or electrical connection.
If it remains unresponsive, further internal repair may be necessary.
How to Tell Whether the Battery or Switch Is Bad
A dead battery and a faulty switch can produce similar symptoms, making the problem difficult to identify.
| Symptom | Possible Cause | First Check |
|---|---|---|
| Flashlight doesn’t turn on | Dead battery or faulty switch | Try a known-good battery |
| Light flickers when button is touched | Switch or loose contact | Inspect switch and contacts |
| Light gradually becomes dim | Low battery or output regulation | Check battery and selected mode |
| Button feels stuck | Dirt or mechanical damage | Clean exterior switch area |
| Light works after tightening tail cap | Loose electrical connection | Inspect tail cap and contacts |
Always test with a known-good battery before purchasing a replacement switch. This simple check can prevent unnecessary repairs.
What If Your Push-Button Flashlight Keeps Turning Off?
If your flashlight turns on normally but shuts off after a few seconds or minutes, the switch may not be responsible.
Possible causes include a weak battery, intermittent electrical contact, or overheating protection.
Some high-output LED flashlights automatically reduce brightness to control temperature or conserve battery power. This is normal and shouldn’t be confused with a switch malfunction.
If the light shuts off completely, check the battery, tail cap, and accessible contacts before assuming an internal electronic fault.
If you’re using a Nebo model, our guide on why a Nebo flashlight keeps turning off covers additional model-specific troubleshooting.
Push-Button Flashlight Maintenance Tips
Regular maintenance can help prevent switch problems and extend your flashlight’s service life.
- Keep it dry: Avoid unnecessary moisture exposure and follow the product’s water-resistance rating.
- Clean the exterior: Wipe away dust and dirt around the button and battery compartment.
- Inspect the contacts: Look for corrosion or damaged springs during battery replacement.
- Remove disposable batteries during long-term storage: This helps reduce the risk of leakage.
- Use compatible batteries: Follow the manufacturer’s voltage and battery-type requirements.
- Check removable seals: Damaged O-rings may allow moisture to enter.
- Avoid excessive force: Don’t press a stuck switch aggressively or pry open sealed parts.
Clean your flashlight when it becomes dirty and inspect it periodically, especially if it’s stored for emergency use.
When to Seek Professional Repair
Some flashlight problems aren’t suitable for home repair.
Consider professional service if:
- The switch is sealed or connected to an internal circuit board.
- The LED or electronic driver appears damaged.
- Internal wiring is burnt or disconnected.
- Water has entered the sealed housing.
- The battery compartment has severe corrosion.
- The flashlight remains unresponsive after basic troubleshooting.
Before paying for repairs, check the manufacturer’s warranty. Some brands offer replacement switch assemblies or factory service for qualifying products.
Frequently Asked Questions
Why does my flashlight only work when I hold down the button?
Some tactical flashlights have a momentary-on feature that works only while the button is partially pressed. Check the operating instructions first. If your model should stay on after clicking but doesn’t, the switch may be worn or damaged.
Can I repair a flashlight switch without replacing it?
Sometimes. Dirt around the button or poor electrical contact may be responsible. Cleaning accessible components can help, but a mechanically broken switch usually requires replacement.
Why does my flashlight flicker when I press the button?
Flickering can result from a weak battery, dirty contacts, loose tail cap, or worn switch. Start by installing a known-good battery and checking the accessible connections.
Can I use WD-40 to fix a flashlight switch?
Don’t spray ordinary WD-40 into the switch or electronic components. It may leave residue and isn’t a substitute for proper electrical cleaning. Follow the manufacturer’s recommended cleaning method.
How do I know if the LED is broken?
If the flashlight has a working battery and clean connections but still produces no light, an LED or driver failure is possible. However, you can’t confirm LED failure from this symptom alone. Professional testing may be necessary.
Is it worth replacing a push-button flashlight switch?
It depends on the flashlight’s value, switch availability, and repair requirements. Replacing an accessible tail-cap switch may be worthwhile, while repairing a sealed electronic switch can be more expensive.
Why is my flashlight becoming dim even with a working switch?
Low battery charge, poor electrical contact, dirty optics, or automatic brightness regulation may be responsible. A working switch doesn’t guarantee the flashlight will produce its normal brightness.
Our guide on why a flashlight grows dim</a covers the other common causes and how to check them.
Final Thoughts: Fix It or Replace It?
Learning how to fix a push-button flashlight starts with identifying the real cause of the problem.
Before replacing the switch, check the battery, contacts, tail cap, and button for obvious issues. Many flashlight problems can be resolved through simple cleaning or battery replacement.
If the switch is physically damaged or the internal electronics have failed, professional repair or replacement may be the better choice.
With regular maintenance, compatible batteries, and careful handling, your flashlight can continue providing reliable light for years.