Last Updated on November 11, 2026
Your flashlight goes out just when you need it, and the spare batteries you thought you had are gone. Annoying, especially if you need to drive to get replacements. I like rechargeable lights because I can put one back on its charger after use and know where to find it next time. But the best rechargeable flashlight for a kitchen drawer may be a poor choice for a long walk, and the best light for a workbench may be too bulky for a pocket.
Start by checking exactly what the cable plugs into. Some lights charge through a port on the body, some use a port on a removable battery, and others need a cradle, a magnetic lead, or a separate cell charger. A light that runs on a rechargeable 18650 can still have no charging port anywhere on the light. This is the first distinction I’d make before paying extra for a rechargeable kit.

Best Rechargeable Flashlight Comparison Chart: Three Picks
For a compact carry light, I’d start with the ThruNite. If the light lives on a charging cradle, I’d choose the Streamlight. The Klarus is the pick here for a focused beam and rear controls. I’ve put the three reviews in that same order. On a phone, swipe across the chart for the charging details. The PD35 TAC and V3.0 comparison is below the three picks.
| Model and review | Product photo | Peak and battery | Charging and best use |
|---|---|---|---|
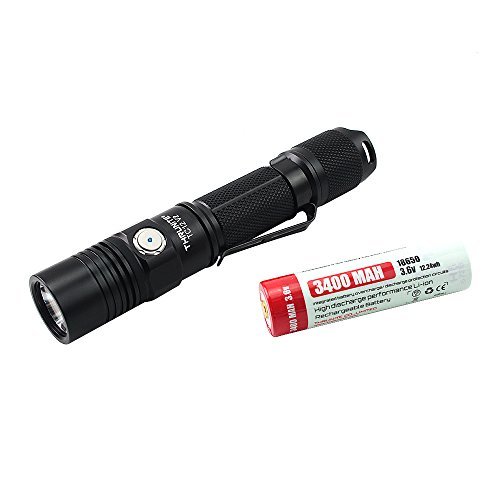
| ThruNite TC12 V2 Read Review |
 Check Price |
1,100 lm peak; removable 18650 | In-light Micro-USB on the version shown here. Compact all-around carry. |
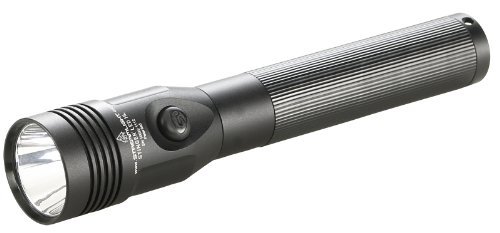
| Streamlight Stinger LED HL Read Review |
 Check Price |
800 lm peak for the version rated at 310 m; NiMH pack | PiggyBack cradle. Best for a regular charging station at work or in a vehicle. |
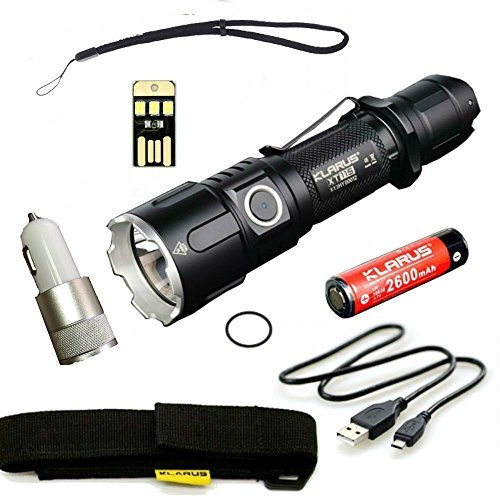
| Klarus XT11S Read Review |
 Check Price |
1,100 lm peak; removable 18650 | In-light Micro-USB. Focused beam with dual rear switches. |
Things to Consider When Selecting the Best Rechargeable Flashlight
Durability
Look for a rating on the actual model. IPX4 is a splash rating and is appropriate for some lights used around the house or in light rain. A light rated for immersion has been tested under more demanding, stated conditions. Neither rating tells you that an open USB port or a damaged seal is safe around water. If you work outside often, look at how the port cover closes and whether a replacement seal is easy to fit. Wipe dirt away before opening the port, then let the area dry before connecting a cable.
I also pay attention to where the light will be stored. A cradle can keep a large light out of a drawer and easy to find. A pocket light needs a clip that holds it firmly and a switch that won’t press against keys. A smooth round light can roll off a truck shelf or a workbench. A simple rubber ring, flats on the head, or a clip can make a real difference there.
Battery Effectiveness
Battery capacity is useful only when you know what output you need. If you take the dog out for half an hour, a medium setting you can use comfortably is more valuable than a Turbo figure that lasts a few minutes. If the light lives in a vehicle, a known charging routine and a spare approved battery can be more valuable than a larger capacity number. If a charger has a separate spare-pack bay, confirm which pack fits and what its status indicator means.
Charge times vary with the battery, charging circuit and adapter. Check the manufacturer’s instructions for the adapter and indicator rather than assuming every light should charge overnight. For occasional use, turn the light on before you put it away and check the charge before a trip or a storm. A battery warning is especially helpful if the light steps down before it shuts off. A charging indicator and a battery level indicator can be different LEDs or use different colors.
Type of Batteries and Charging Connections
The rechargeable battery may be removable, built into the body, or part of a model-specific pack. A rechargeable and a replaceable battery are not opposites. Some lights use both, as with a removable 18650. Others use a dedicated NiMH pack you can replace but can only charge using approved equipment. Check the recommended chemistry, dimensions, terminal style and charging method. Two batteries with the same size printed on the wrapper can have different lengths and contacts.
- In-light USB-C: The cable goes into the flashlight. On the Fenix PD32R, the port is underneath the threaded neck. Check the manual for the correct way to expose and close it.
- In-light Micro-USB: The cable also plugs into the flashlight, but uses a different connector. The older ThruNite TC12 V2 and the Klarus XT11S are examples. Before packing a spare cable, look at the actual port because a later revision can use a different one.
- USB on a removable cell: Take the cell out and connect the cable to the cell itself. That is how USB-equipped PD35 V3.0 batteries charge. A plain compatible rechargeable cell can still need an external charger.
- Proprietary magnetic connection: The magnetic lead may have a regular USB plug at the power supply, but its other end is specific to the light. The Olight Seeker 4 Pro review shows why the distinction matters. Its USB-C holster and optional magnetic lead provide different ways to charge that model.
- Cradle or external cell charger: The Stinger and Maglite examples charge in matching docks. An external charger for an 18650 charges the cell after you remove it, as with a plain cell in the PD35 TAC. These systems need the correct hardware even if their power adapters look alike.
A supported primary CR123A pair is a useful backup for some models, but primary cells must stay out of charging circuits. Two small cells that fit a tube are not automatically a safe substitute for one 18650. Follow the maker’s instructions on lithium primary and rechargeable backup cells. If you keep spares, carry them in a battery case so the terminals cannot touch keys, tools, or other cells.
Brightness
For a best rechargeable flashlight comparison, lumens are a starting point. The figure tells you how much light comes out, while candela tells you how concentrated the beam is at its brightest point. A tightly focused light may help you see the far end of the yard with fewer total lumens. I prefer more spill around the bright center for close work and finding my feet on an uneven path. The guide to flashlight flood and throw explains the difference.
Pay attention to the light level after the first few minutes. Heat or a falling battery voltage can cause the driver to reduce output. A runtime beside Turbo can include most of its time below the advertised peak. If you need light for an entire shift, look at the manufacturer’s runtime chart for a setting you can hold comfortably. For a flashlight in a bedroom or tent, also check the lowest output. A dim mode makes reading or moving around easier without reflecting a bright beam off every white surface.
Features and Modes
I look for a useful low and middle setting first. A separate Eco or Firefly can be helpful close up. Strobe and SOS are separate features and don’t come with every light. Check whether the normal switch cycle includes strobe, whether the light remembers its last setting, and what happens after a battery change. If you lend the flashlight to other people, a simple mode order usually matters more than a long list of programs.
Design
Try to picture where you will carry the light. A longer aluminum duty light sits well in a cradle but can pull down a pocket. An everyday carry light should be small enough that you will actually take it with you. For more on grip, switches and clips, see What is the Best EDC Flashlight? Think about whether you need to operate it with gloves, reach it with one hand, or set it upright for reflected light.
Ease of Use
A rear switch is easy to locate by feel in an overhand grip. A side switch can be easier to reach while walking and holding the light at your waist. Some models put power at the tail and mode selection on the side. If the light has two rear controls, identify the main switch and the mode button before relying on it in the dark. A lockout is useful for a bag, provided you remember how to unlock the light without looking at the manual.
Accessories
Check that the kit actually contains the charging hardware you need. A light may be sold with a bare cable, with a wall adapter, or with a cradle and both wall and vehicle power leads. A holster can be more valuable than a spare clip if you carry a larger light. If a battery is included, check what kind and whether the kit charges that cell in the light. A spare O-ring helps when an existing seal wears, but it won’t make a damaged USB cover watertight.
Brand and Service
Check warranty terms for the battery, charger, switch and light separately. If a removable pack is unique to a model, make sure you know how to identify the correct replacement before the original wears out. A brand name and an initial output rating tell you little about the charger you will live with. I’d compare the whole kit, including the size and weight, before paying extra for more output.
Best Rechargeable Flashlight Reviews for 2026
The first three reviews follow the comparison chart. The other lights are here for people comparing a particular older model, a dedicated charger, or a different beam. I’ve separated the cases where a photo shows one generation and the product link goes to another. Use the version stamped on the light when choosing a cable or battery.
ThruNite TC12 V2 Rechargeable Water-Resistant EDC Flashlight
The TC12 V2 is my compact pick from this group. The original Micro-USB version combines a removable 18650 with a cable that plugs into the body. A rear switch handles power and the side switch handles brightness. The regular mode choices are Firefly, Low, Medium, High and Turbo, plus strobe. A low setting you can actually use close up is one of the reasons I’d pick this over a large duty light for a drawer or a weekend bag.
The earlier Micro-USB manual lists up to 1,100 lumens, 14,399 candela and 240 meters. It lists 472 lumens for High and 200 for Medium, with rated runtimes of 3.4 and 8.7 hours respectively. Treat that figure as peak output. The light reduces output as it heats up, so it makes more sense to use High or Medium if you need a beam throughout a walk. The highest setting is useful for a quick look across an open space. At arm’s length, the lower modes are often enough and easier on the eyes.
The chart’s link identifies the Micro-USB TC12 V2. The product link in this review identifies a cool-white TC12 V2 described as USB-C. Check the port on the unit before choosing a lead. The same TC12 V2 name can appear in descriptions for both versions. The old specifications for the Micro-USB version should not be used to infer every charging detail of the USB-C version.
Good fit: You want a slim, two-switch flashlight for everyday use with a replaceable 18650. Trade-off: If you already travel with only USB-C cables, confirm the TC12 V2 version before you count on leaving the other cable at home. Inspect the rubber cover after charging, especially if the light lives in a pocket that collects lint.
Streamlight 75434 Stinger LED HL Rechargeable Light
The 75434 kit is the Stinger LED HL with a PiggyBack charger. It’s a larger aluminum handheld with a rubberized grip, a head-mounted switch, three steady levels and strobe. The current 800-lumen spec is rated at 24,000 candela and 310 meters, with 1 hour 30 minutes at the High setting. The older 640-lumen, 297-meter rating belongs to an earlier generation. The Stinger DS LED and DS LED HL names identify other switch configurations, so don’t use their specifications for this single-switch kit.
The Stinger is my pick for a fixed charging spot in a shop or a vehicle. It uses a rechargeable NiMH pack. The flashlight sits in the cradle and the PiggyBack version has a separate bay for a spare pack. You plug power into the charger, not into a USB port on the flashlight. This is convenient when the light goes back to the same spot after each use. For a walk with a small bag, the size of the body and charger are drawbacks.
Choose a light level by task. The manufacturer rates the 800-lumen version at 400 lumens for 2 hours 30 minutes on Medium and 200 lumens for 5 hours on Low. Low is still bright enough to be useful outside, but it’s brighter than I’d want when reading next to someone who is asleep. The IPX4 body is intended for splash resistance. Keep the cradle in a dry spot, check it seats fully, and compare kits by the power leads and spare-pack support rather than their headline lumens alone.
Klarus XT11S Rechargeable Tactical Flashlight
The XT11S is the compact pick for a more concentrated beam and rear controls. Its Cree XP-L HI V3 emitter reaches a rated 1,100 lumens, 27,225 candela and 330 meters. The two rear controls and the side switch serve different purposes depending on the operating setting. That makes the XT11S flexible if you want a particular shortcut, but I would get familiar with the mode you have chosen before relying on it in the dark. The Klarus XT11S and XT11GT comparison covers those controls and the model differences.
The XT11S in this review charges a compatible 18650 through its Micro-USB body port. The XT11GT and later XT11S-3E are different models. The fact that a newer Klarus has USB-C does not make this version a USB-C light. Two supported CR123A cells can serve as a backup. They are primary batteries, so remove them before charging. Follow the XT11S manual for the cell and adapter specification, and do not borrow charging instructions from another light that looks similar.
Its 330-meter figure is a standard beam rating, and its peak output can step down as the light warms. I’d use the tight center for checking the far side of a property or looking down an open trail. For close maintenance work or a tent, the TC12 V2’s lower modes and simpler mode selection are more appealing. If you’re buying the Klarus for the rear switches, look at how the tailcap sits in your grip and whether the switch arrangement works with gloves.
Fenix PD35 TAC and PD35 V3.0
These lights can run on a rechargeable battery, and that is the sense in which they belong in this guide. Neither has an in-light USB port. The earlier PD35 TAC is the 1,000-lumen Tactical Edition. It uses one compatible rechargeable 18650 or two CR123A primary cells. The 1,700-lumen PD35 V3.0 is a different light, with a different beam, mode sequence and kit battery. The Fenix PD35 model review also separates the TAC, V2.0 and V3.0.
Technical Specifications of the PD35 TAC and V3.0
| Feature | PD35 TAC | PD35 V3.0 |
|---|---|---|
| Peak output and beam | 1,000 lm, 10,000 cd, 200 m | 1,700 lm, 31,900 cd, 357 m |
| Lowest steady mode | 8 lm; up to 140 hours | 5 lm; rated 230 hours with the earlier 2,600 mAh chart or 300 hours with the 3,400 mAh chart |
| Rated peak-mode runtime | 1 h 10 min including lower output | 1 h 25 min with 2,600 mAh or 1 h 44 min with 3,400 mAh, including step-down |
| LED | Cree XP-L V5 | Luminus SFT40 |
| Controls | Rear power switch and side switch; Outdoor and Tactical operation | Rear power switch; side switch selects five steady levels and strobe |
| Body and carry | Anodized aluminum; about 137 mm and 89 g without battery | Anodized aluminum; about 134 mm and 84 g without battery |
| Water resistance | IPX8 | IP68 |
| Battery format | One compatible rechargeable 18650 or two CR123A primaries | One compatible rechargeable 18650 or two CR123A primaries |
| How to charge | Remove the 18650. Use an approved external charger or the cell’s own USB port, where fitted. | Remove the 18650. Earlier USB-equipped battery kits use Micro-USB on the cell; later kits use USB-C on the cell. |
In the TAC’s Outdoor operation, the rear switch supplies power and the side switch changes modes. Its Tactical operation uses a smaller set of choices at the tail. The V3.0 uses a rear power switch and a side mode button. For ordinary indoor use, the V3.0’s 5-lumen Eco can be more useful than the headline Turbo. For a longer walk, pick a middle setting and keep Turbo for short checks. The published peak-mode runtimes include time at reduced output, so they are useful for comparing a mode and battery together.
Older PD35 kit: The photo shows an earlier Tactical Edition kit with a separate charger. The older PD35 kit link is separate from the V3.0 link, and the cells shown are part of the pictured kit. Check the markings on the actual light and the supplied battery before following any charging instructions.
 Check price for the older PD35 kit
PD35 V3.0: The following two links are for the V3.0. The older Tactical Edition photo is retained here so the difference is clear. On the V3.0, remove the rechargeable 18650 to use its own USB port. Look at the battery itself for Micro-USB or USB-C. If you want the cable to plug into the light, the PD35 vs UC35 comparison explains how the charging layouts differ.
PD35 V3.0 kit: Check Today’s Price at Amazon
Maglite RL1019 LED Rechargeable Light
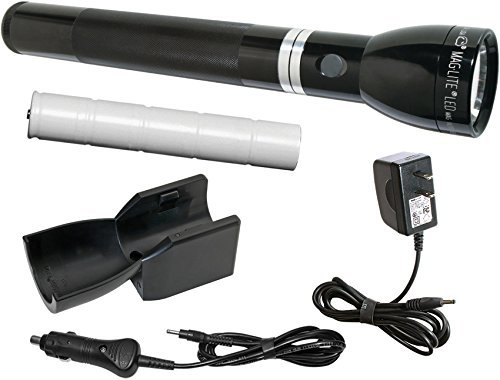
The RL1019 is the older full-size Mag Charger LED system. Its manufacturer figures are 643 lumens and 407 meters, with rated runtimes of four hours on High, 17 hours on Low and 37 hours on Eco. It takes a rechargeable NiMH pack and charges in a matching Mag Charger cradle. The wall converter and vehicle adapter feed the cradle. The pack and cradle are different from the ones used by the lithium-based ML150LR, so check the label on both pieces when replacing a charger.
 Check Today’s Price on Amazon
There’s room for a substantial grip, and the adjustable beam is useful when you alternate between checking a nearby surface and looking farther down a driveway. The QuickClik setup lets you select a function set. Check the sequence on the light if it has been used by someone else, because a button press can behave differently depending on the set selected. The size is the main trade-off. I’d keep this style of light in a garage or vehicle charging spot and take a smaller light for a walk.
If you only need a light you can grab with one hand and put in a pocket, the Maglite XL50 review shows how different a three-AAA light is in size and operation. It’s a useful size comparison. The RL1019’s advantage here is having a dedicated place to charge and store it, rather than being able to share batteries with a compact model.
SureFire P1R Peacekeeper and the Linked G2X Pro
The pictured light is the older P1R Peacekeeper, a dual-output aluminum handheld with 600 and 15 lumens. Its rechargeable 18650 comes out of the light for charging with a compatible external charger. The 600-lumen dual-output version was rated at 17,600 candela. The 600-lumen Peacekeeper Tactical is a separate single-output model. Later P1RZ lights have their own battery and output specifications, so a Peacekeeper name on a box isn’t enough to select a charger.
At 15 lumens, the older dual-output light makes sense for a map or a close inspection. High adds reach and spill for scanning a larger area. You can pack a compatible charged spare for long use, but you still need a separate way to recharge a plain cell. That makes a body-charging light more convenient if you have access to a power bank and carry little other gear.
Photo and link: The photo shows the P1R Peacekeeper, but the link goes to a tan SureFire G2X Pro bundle. The linked light uses two CR123A primary cells in the supplied setup and has no charging port. It is here as a handheld alternative for readers who prefer the supplied primary-cell setup. See the SureFire G2X Pro review for the linked model’s polymer body and low-first operation.
 Check price for the G2X Pro bundle
Nitecore MH25GT and MH25 V2
The MH25GT in the photo is the earlier 1,000-lumen model. It is rated at 51,100 candela and 452 meters and charges a compatible 18650 through a Micro-USB port on the body. The manual specifies that the rear switch must be on for charging. The light uses a tail switch and a twist of the head to select between its Turbo and user-defined operation. Its manual describes a Turbo step-down after three minutes. The one-hour Turbo-mode rating is a useful reminder that peak output and total mode runtime are different measurements.
The link goes to the newer MH25 V2. Its manual gives 1,300 lumens, 57,000 candela and 475 meters. It charges through a USB-C port on the body and normally uses a 21700 rechargeable cell. The manual specifies an adapter for supported smaller battery formats. Follow the battery chart before substituting a smaller cell, and keep primary cells out of the charging circuit. The V2 uses a tail switch and a side mode switch. Do not use the GT’s head-twist procedure to select V2 modes.
 Check price for the MH25 V2
I’d consider these if a concentrated beam and a larger head suit the job. The extra reach helps when checking a distant landmark. A shallower, wider beam may be easier to use for tasks close by, and a small flashlight is less awkward in a pocket. Pick the version whose cable and cells you already know how to support, then use the appropriate runtime chart for the mode you need.
Anker Bolder LC90 Rechargeable Flashlight
The Bolder LC90 is a zoomable handheld with a rated maximum of 900 lumens and a removable rechargeable 18650. The Micro-USB port is under the rear cap. This is a port on the light, so you can charge the compatible battery in place. The light offers High, Medium, Low, Strobe and SOS. The head adjusts from a broad beam for nearby work to a more concentrated beam for looking ahead.
 Check Price
I’d consider the LC90 for an occasional dog walk, household jobs or checking around a vehicle. The zoom can save you from carrying two lights when your tasks are simple and close together. Pay attention to what happens to the surrounding spill as you narrow the beam. For an uneven trail I prefer seeing the ground around the center of the beam, so I would use a wider setting most of the time.
The IP65 rating on the pictured model is for dust and water jets under test conditions, so it belongs in the category of lights I’d protect from immersion. Keep the rear cover secured after charging. The older Micro-USB connector is worth checking if the rest of your equipment uses USB-C. The Anker LC90 review goes into its five settings and adjustable head.
CVLIFE Tactical T6 Image and Linked Magnetic Rail Light
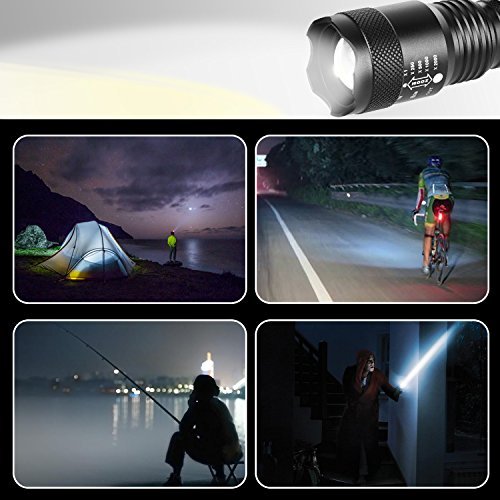
The older graphic shows a handheld spotlight style. Its exact version cannot be identified from the picture. The linked product is a separate CVLIFE rail-mounted light, rated by its maker at 1,500 lumens and up to 200 meters. Its supplied magnetic lead contacts the light to recharge it. The plug at the power supply end does not make the light itself a USB-C flashlight. I would keep the matching lead with the light if it is stored somewhere away from the rest of your charging equipment.
 Check price for the CVLIFE magnetic rail light
I have kept this example separate from the handheld picks. For a general flashlight you can use around the house, choose one of the handheld models above. If you are evaluating the linked rail light, check the maker’s fit information for the exact equipment and compatible rail. The older T6 image does not establish the linked light’s switch sequence, battery or runtime, and the headline peak tells you little about how long it can hold that level.
Supernova Guardian 1300XL Tactical Light
The Guardian 1300XL is an older handheld option for people who already have the kit. Its manufacturer describes the package with two rechargeable 18650 cells and lists a matching external single-cell charger. The spare cell gives you a way to replace a depleted battery in the field. Charge the cell in the compatible external charger and check the actual markings before buying replacements. The kit’s battery count does not tell you to put two cells into the light.
The maker describes the Guardian as IPX4, which is splash resistance. The model name alone does not tell me how much light it sustains or for how long, so I would not choose it based on the number in the name. If you already own one and it still meets your needs, compare how it works at the setting you normally use. If you need to share a USB cable across devices, one of the in-body charging picks is more convenient.
Rechargeable Fenix UC35 LED With Anti-Roll Design
The original Fenix UC35 is a 960-lumen, 200-meter model. The UC35 V2.0 is rated at 1,000 lumens, 17,700 candela and 266 meters. Both have Micro-USB charging on the flashlight body and use a compatible rechargeable 18650. The V2.0 also supports two CR123A primary cells for backup use. Remove those primary cells before charging. Both families have a tail power switch and a side control for brightness, but check the manual for your generation before connecting the cable.
One easily missed detail is the rear switch. The original UC35 requires the tail switch to be on when starting a charge. That is an original-model instruction. For V2.0, follow the V2.0 procedure and interpret the indicator as the manual describes. If you want to compare the two versions before choosing, the Fenix UC35 review covers both. For a light that already has trouble charging, the UC35 V2.0 charging and troubleshooting guide covers the port, cable and battery checks.
The V2.0 gives you a low setting for close tasks as well as a beam you can use outdoors. If you start on Turbo, expect the output to step down with heat or battery conditions. For long, ordinary use I’d pick the lowest setting that still gives enough light to do the job. That also makes it easier to notice a fault: a light that comes on normally and then steps down under heavy use behaves differently from one that will not take a charge at all.
Conclusion
The best rechargeable flashlight is the one you will carry or keep charged where you need it. I’d start with the TC12 V2 for compact carry and check the exact charging port. I’d take the Stinger LED HL for a shop or vehicle that already has room for a cradle, and the XT11S for its tighter beam and rear controls. If you are comparing older lights, the Fenix, SureFire and Nitecore sections show why the version name and charging location matter as much as the maximum output.
FAQ
What features should I look for in a rechargeable flashlight?
Start with the way it charges, the kind of battery it accepts, the brightness you can sustain and the lowest mode you will actually use. A cable that works with your existing gear is useful for travel. A fixed cradle makes more sense for a light that always comes back to a desk, shop or vehicle. If you carry the light daily, check switch access and clip placement as well. Our flashlight buying guide covers those trade-offs.
Should I charge the battery before the first use?
Check the manual and follow the charge indicator for your exact light or cell. Remove a shipping insulator if the instructions say the light has one, check the battery orientation, and use the specified cable or charger. If it fails to start charging, recheck the port, cable, pack and any switch step in the model instructions before assuming the cell is dead. Don’t charge a primary battery or use a damaged cell.
Is a rechargeable flashlight always the better choice?
I prefer one for routine use when I have access to power. For a kit that spends a long time in storage or travels away from power, a light that accepts approved primary backups can be useful. Check your backup cells periodically and pack the correct charger or cable. A replaceable rechargeable cell can also help when you need to keep working without waiting for the light to recharge.
Still have a question after reading this best rechargeable flashlight guide? Comment below.